Live chat support software brings convenience and efficiency in delivering customer support. Let’s learn how to install Rocket.Chat on your business website.

Overview
We have published some blog posts related to open source live chat software such as Top 5 Free Customer Support Chat Software for Website, WordPress Instant Messaging Using Rocket.chat, and some more. In this blog post, we will go through the top leading customer support software Rocket.Chat. With the huge increase in online traffic, businesses find it hard to entertain a great number of inquiries on time. Visitors come to your site, tend to acquire some information related to the products or services, and leave your site in case of receiving no response. Therefore, live Chat Support helps you greet your customers pro-actively while they are going through your website. Or, in case they need some help and clarification to make their purchase decisions.
Live Chat Support increases your chance of converting a visitor into a customer. There are lots of open-source live chat support software available. But, Rocket.Chat has gained a lot of attraction because of its features. And it’s being treated as an alternative to industry-leading chat software like Slack, and Microsoft Team. In this article, we’ll learn how to install Rocket.Chat on a server and then how to configure it on your website. So, Let’s get started by covering the following points.
- What is Rocket.Chat?
- How to install Rocket.Chat?
- Enable Live Chat Feature
- Install Live Chat Widget on Your Website
- Conclusion
What is Rocket.Chat
Rocket.Chat is amongst the popular live chat software. It has a free live chat version as a community edition as well as a paid hosted live chat version for large companies with private internal chat features. Rocket.Chat supports live chat customer support along with the team chat feature. It is cross-platform and offers support for almost all popular platforms such as Windows, Mac, Linux, and mobile apps as well. This customer support software is secure, extensible, and offers integration with third-party popular apps such as Trello, Google Drive, and more. There are many powerful features that Rocket.Chat offers such as multiple rooms, private chat rooms & groups, notifications, emojis, LDAP authentication, and RESTful interface. In addition, this free tool is easy to deploy and comes with self-hosting capabilities. Moreover, it offers a logical and user-friendly interface where users can modify the themes such as dark, light, or black.
This chat support software is written in JavaScript, all documentation is available regarding development and deployment. Therefore, you can find all the source code on Github. For more details, you can read about Rocket.Chat here.
How to install Rocket.Chat
So, we know what is Rocket.Chat and in this section, we will learn how to install this live chat software. You can install Rocket.Chat from a variety of marketplaces, like Ubuntu Snaps, DockerHub, or install it on your own server. In this article, we’ll focus on Rocket.Chat’s installation via Snaps on Ubuntu. Which is the fastest method of Installation.
Snaps are secure. Rocket.Chat and all of its dependencies are isolated from the rest of your system. Snaps also auto-update when there is a new release.
On Ubuntu first, install Snap with the following command
sudo apt-get install snapd
Then install Rocket.Chat Server via snap command.
sudo snap install rocketchat-server
Snap is already up and running. Browse to http://localhost:3000 and set up Rocket.Chat. You can configure the Nginx proxy to map Rocket.Chat instance with your domain.
Enable Live Chat Feature
Once Rocket.Chat software is installed and configured, the next step is to enable its features. This section of the blog post describes how to enable chat support software on your website. To enable the Livechat feature on your Rocket.Chat instance:
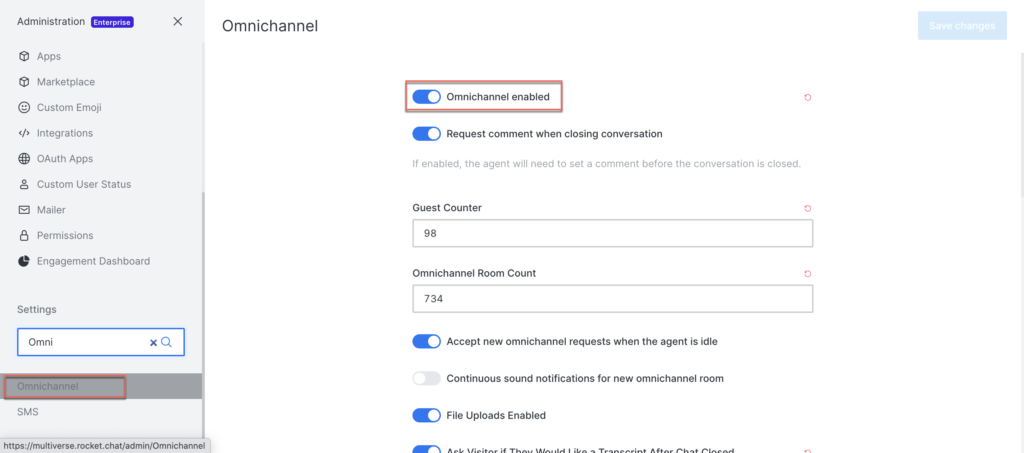
- Go to Administration
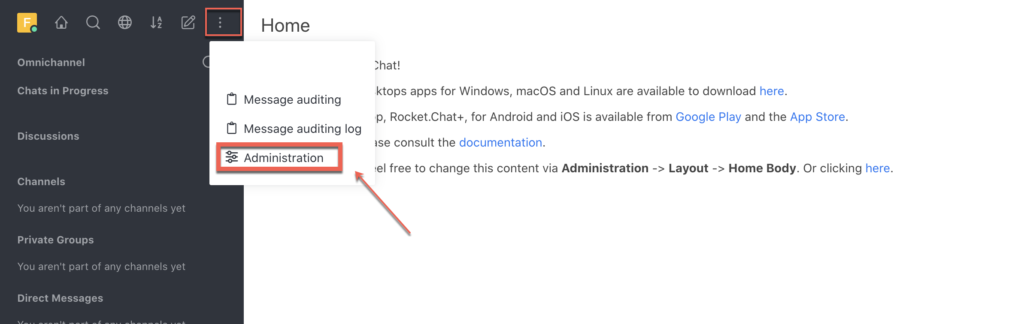
- Search ‘Omnichannel‘ in Settings and enable it.
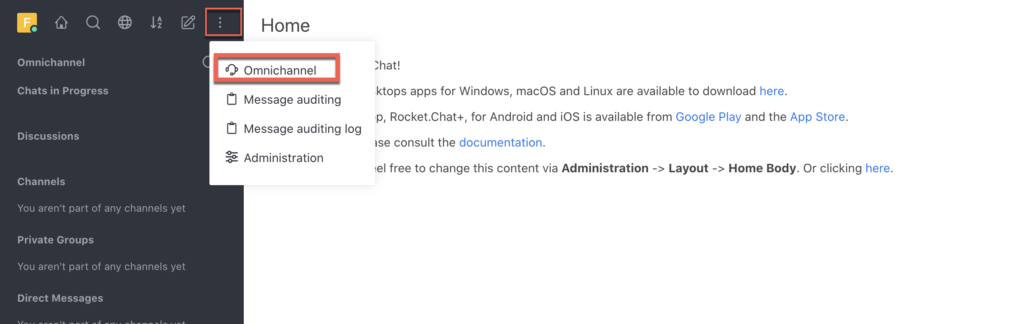
Once enabled, an admin will have access to Omnichannel Panel Settings via a new menu called Omnichannel at the top left corner dropdown menu.
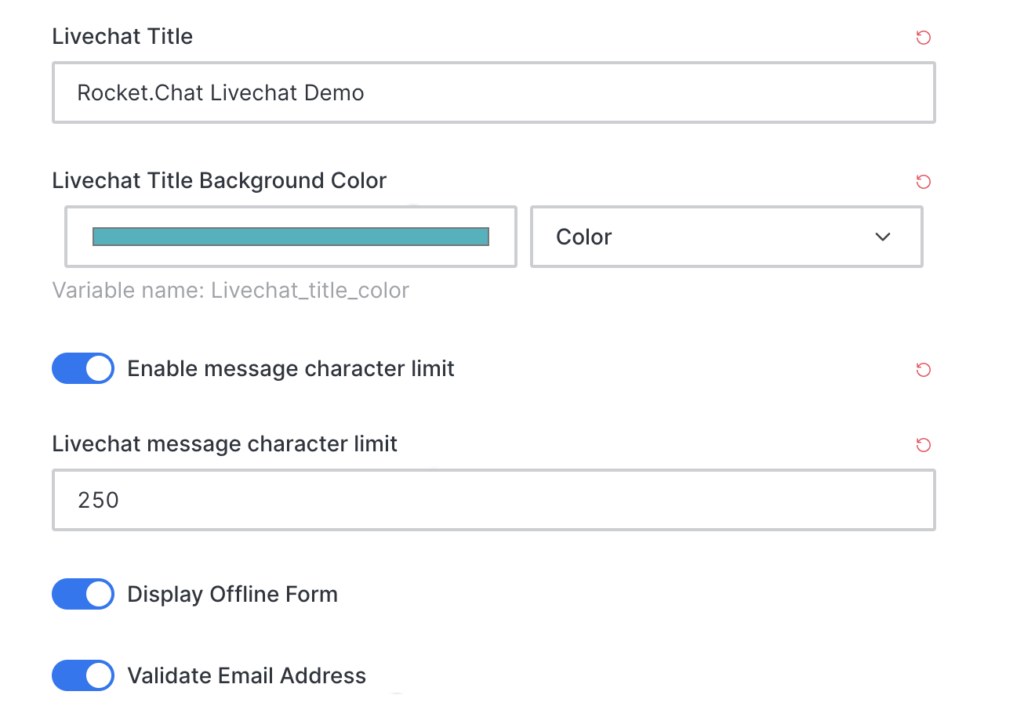
And then configure Live Chat Widget’s Look and Feel
Install Live Chat Widget on Your Website
In this section, we will install live chat widgets on the business website. Now, to access Livechat Installation settings:
Go to Livechat Installation in the omnichannel panel settings, as shown below, and copy the given piece of code.
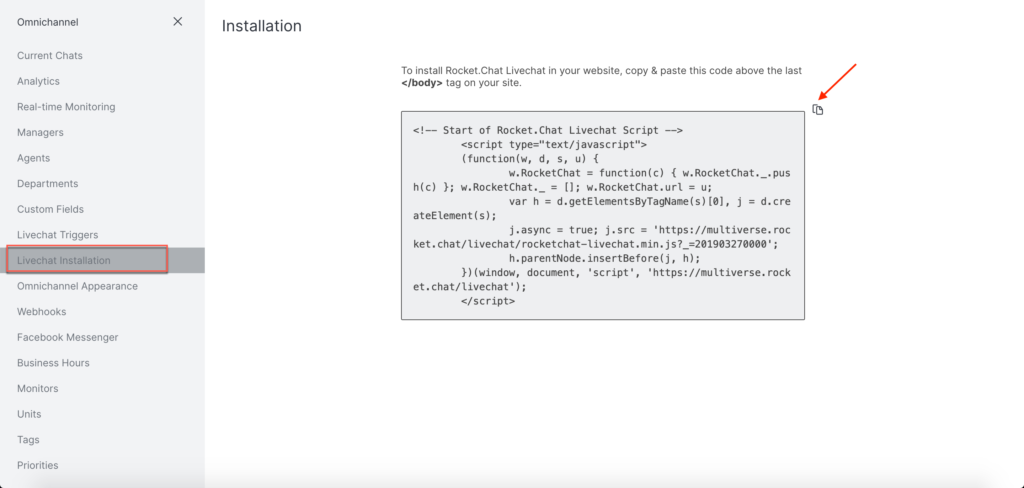
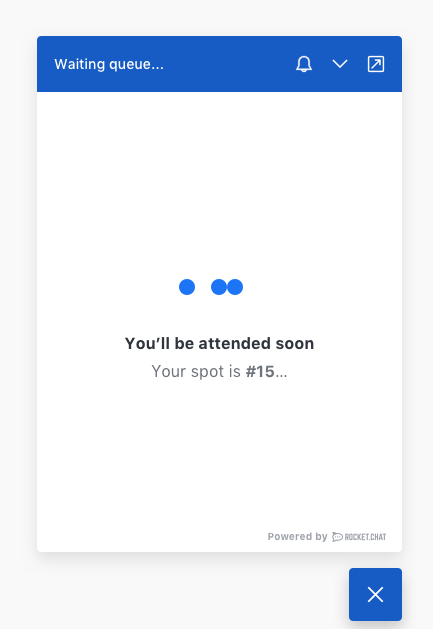
And, paste this code above the last tag on your site; the live chat widget will appear on the bottom right corner of your webpage. As shown below as per your Live Chat configurations.
Conclusion
This brings us to the end of this blog post. In this article, we have gone through what is Rocket.Chat, how to install Rocket.Chat and we also have shown you how to install it on your own server via Ubuntu Snaps. We also learned how to enable the live chat feature and install the widget on your website. In addition, customer support software has become a must-have component of any business website due to certain factors that we discussed above. However, this blog post will really help you if you are looking to deploy an open source live chat software on your business website. Further, there are many other chat support software & articles available in the “Explore” section below that you can check out.
Finally, containerize.com is writing articles on further open source** open source chat apps.** Therefore, please stay in touch with the Live Chat category for regular updates. Moreover, you can follow us on our social media accounts Facebook, LinkedIn, and Twitter.
Explore
You may find the following links relevant.
- Zulip
- Lets-Chat
- Botpress
- How to create an AI-based FAQ Bot for your business using Botpress
- Top 5 Free Customer Support Chat Software for Website
- WordPress Instant Messaging Using Rocket.chat
- Automate Business Operations Using Free and Open Source Software
- How to Create and Run a Bot in Rocket.Chat using Botpress
- Automate Business Operations Using Free and Open Source Software