Page speed and load times are the key factors for better ranking in search engines. GZIP compression can make it happen and provide a competitive edge.
Overview
As Google and other search engines are considering a website’s User Experience (UX) a critical factor in their ranking algorithms. It has become more important to improve and optimize your website for top ratings. Among the most important factors to pay attention to are, page speed and loading times. And, the fastest and easiest way to improve site speed and performance is to enable GZIP compression on your website. There’s a chance that your web host automatically enables GZIP compression for you. If not, you have to perform this crucial task yourself.
In this article, we’ll show you exactly how to easily enable GZIP compression in WordPress. Let’s get started!
- What is GZIP Compression?
- How does GZIP Compression Work?
- How to verify if GZIP Compression is Enabled?
- Enable GZIP Compression in WordPress
- Conclusion
What is GZIP Compression?
GZIP is a file format and a software application used for file compression and decompression. Web servers or other software use GZIP compression to compress data files before it is sent to users’ browsers. This reduces the file download time which makes your website faster. All modern browsers support GZIP compression.
It’s also important to note that GZIP compression must be enabled on your web server before you can enable file and folder compression. Shortly, we’ll see how to verify whether your web server has GZIP enabled.
How does GZIP Compression Work?
Gzip, the most popular compression method, is used by web servers and browsers to compress and decompress content as it’s transmitted over the Internet. It is used mostly on code and text files, gzip can reduce the size of JavaScript, CSS, and HTML files by up to 90%. By default, Gzip compression does not compress images or videos. For that, you’ll need to optimize images for the web on your WordPress site. This is why most website speed test tools like Google Pagespeed Insights highly recommend enabling GZIP compression.
When a web server receives a request for a web page, the webserver checks the header of the request to check if the browser supports Gzip. If so, the server generates the markup for the page before applying GZIP. Gzip converts the HTML markup into compressed data which is then delivered to the end-user. When the end-user receives the compressed data, their browser decompresses it.
How to verify if GZIP Compression is Enabled?
Your web host might enable compression in WordPress by default. However, this isn’t always the case. You can determine to see if you already have GZIP compression enabled using Chrome’ DevTools.
Open your site in a chrome browser, then right-click anywhere on the page and select Inspect to open the developer tools.
Next, navigate to the Network tab and click on the main URL of the website from the “Name” section. Select the Headers tab, and then scroll down to find the Response Headers section:
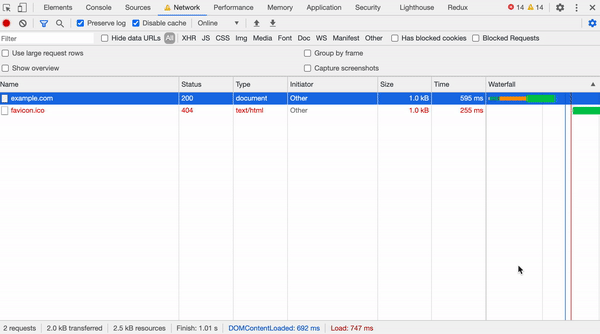
There, you’ll see whether or not GZIP compression is enabled.
Enable GZIP Compression in WordPress
If you’ve determined that WordPress GZIP compression is not yet enabled, there are multiple methods you can use to get it running. The easiest way is to use some WordPress plugins like WP Rocket, WP Super Cache, or W3 Total Cache. However, you can manually do this at the server level either by .htaccess file or by updating your Nginx config.
By editing .htaccess file
One of the most common ways to enable WordPress GZIP compression is to** edit your .htaccess file**. However, this involves the risk of breaking something. This is a sensitive server file, and one wrong move could cause a lot of problems.
To reduce the risk, be sure to save a copy of the original file before making any changes. The .htaccess file should be in the root folder of your website. After you open .htaccess, add the following code below the sections marked by the # BEGIN WordPress and # END WordPress tags
# Compress HTML, CSS, JavaScript, Text, XML and fonts
AddOutputFilterByType DEFLATE application/javascript
AddOutputFilterByType DEFLATE application/rss+xml
AddOutputFilterByType DEFLATE application/vnd.ms-fontobject
AddOutputFilterByType DEFLATE application/x-font
AddOutputFilterByType DEFLATE application/x-font-opentype
AddOutputFilterByType DEFLATE application/x-font-otf
AddOutputFilterByType DEFLATE application/x-font-truetype
AddOutputFilterByType DEFLATE application/x-font-ttf
AddOutputFilterByType DEFLATE application/x-javascript
AddOutputFilterByType DEFLATE application/xhtml+xml
AddOutputFilterByType DEFLATE application/xml
AddOutputFilterByType DEFLATE font/opentype
AddOutputFilterByType DEFLATE font/otf
AddOutputFilterByType DEFLATE font/ttf
AddOutputFilterByType DEFLATE image/svg+xml
AddOutputFilterByType DEFLATE image/x-icon
AddOutputFilterByType DEFLATE text/css
AddOutputFilterByType DEFLATE text/html
AddOutputFilterByType DEFLATE text/javascript
AddOutputFilterByType DEFLATE text/plain
AddOutputFilterByType DEFLATE text/xml

# Remove browser bugs (only needed for really old browsers)
BrowserMatch ^Mozilla/4 gzip-only-text/html
BrowserMatch ^Mozilla/4.0[678] no-gzip
BrowserMatch bMSIE !no-gzip !gzip-only-text/html
Header append Vary User-Agent
Save the file and upload it to your site’s server. When you’re done, check if the GZIP is enabled using Chrome’s DevTools as explained above.
Enable GZIP Compression in Nginx
To enable compression, include the gzip directive with the on parameter. gzip on; By default, NGINX compresses responses only with MIME type text/html . To compress responses with other MIME types, include the gzip_types directive and list the additional types.
You can enable GZIP compression in WordPress by opening your Nginx.conf file and adding the following code:
gzip on;
gzip_disable "MSIE [1-6].(?!.*SV1)";
gzip_vary on;
gzip_types text/plain text/css text/javascript image/svg+xml image/x-icon application/javascript application/x-javascript;
Conclusion
This is the end of this GZIP WordPress tutorial. There are many ways to optimize your website for speed and performance. In this GZIP WordPress tutorial, we have gone through what is GZIP compression, the importance of GZIP compression, and its installation steps. In addition, there are many relevant links mentioned in the “Explore” section below.
Finally, containerize.com is writing articles on further open source products. Therefore, please stay in touch with the Blogging category for regular news and updates.